Hexo部署(GitHub Actions)
之前的文章都只儲存在本機,現在想想以前怎麼這麼蠢,藉著這次更新就順便設定 Private Repository 跟 GitHub Workflow 吧
產生 SSH Key
1 | ssh-keygen -t rsa -C "gundambox.shi@gmail.com" |
產生過程中出現 Enter passphrase (empty for no passphrase): 的時候
不要輸入,直接按 enter 跳過
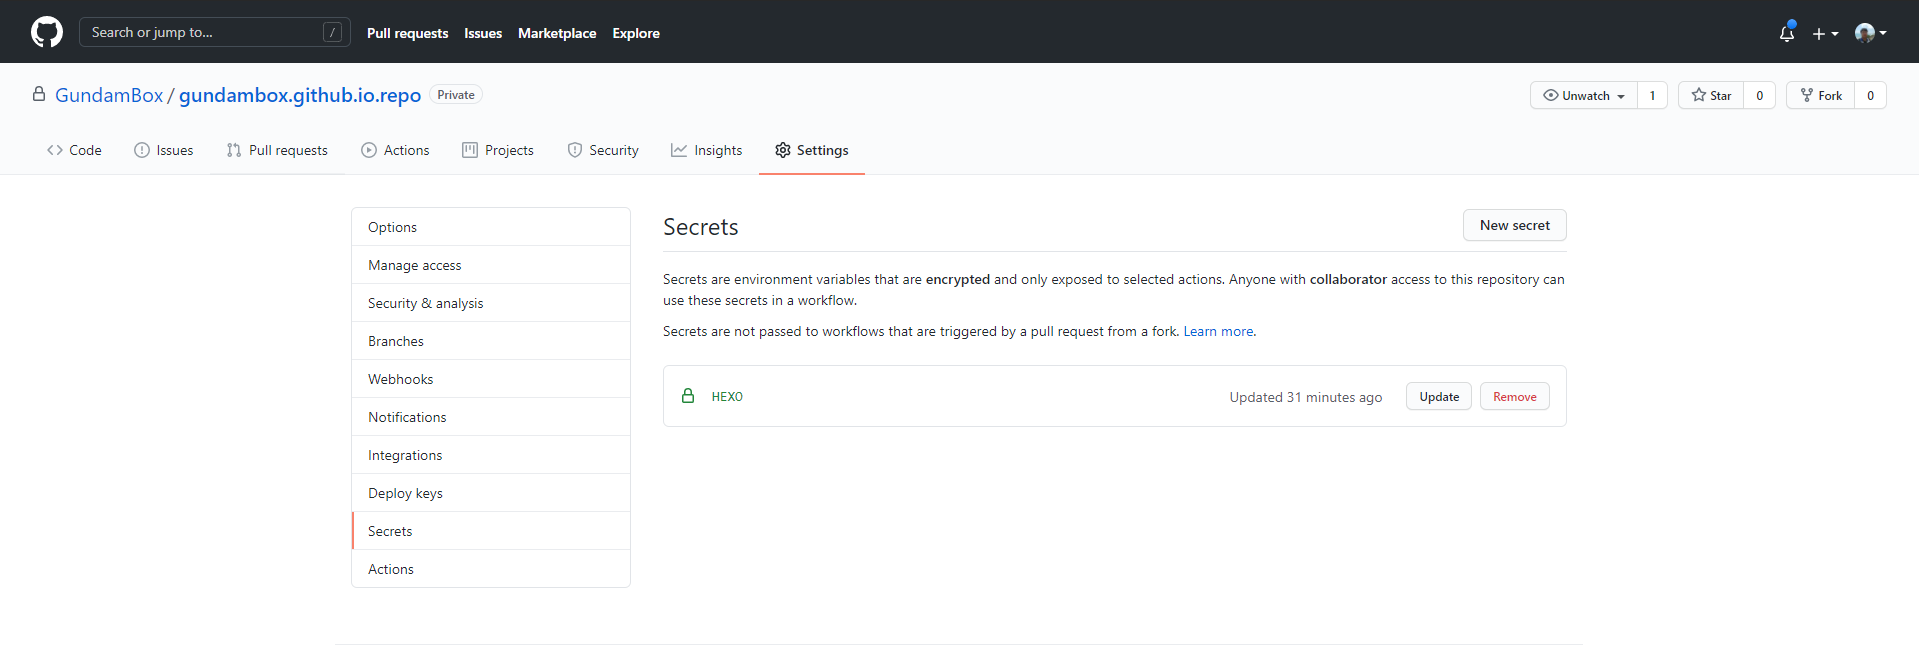
在 Private Repository 加入 Private Key
Private Repository -> Settings -> Secrets -> New Secret
將剛剛產生的私鑰複製貼上,並將名稱命名為 hexo

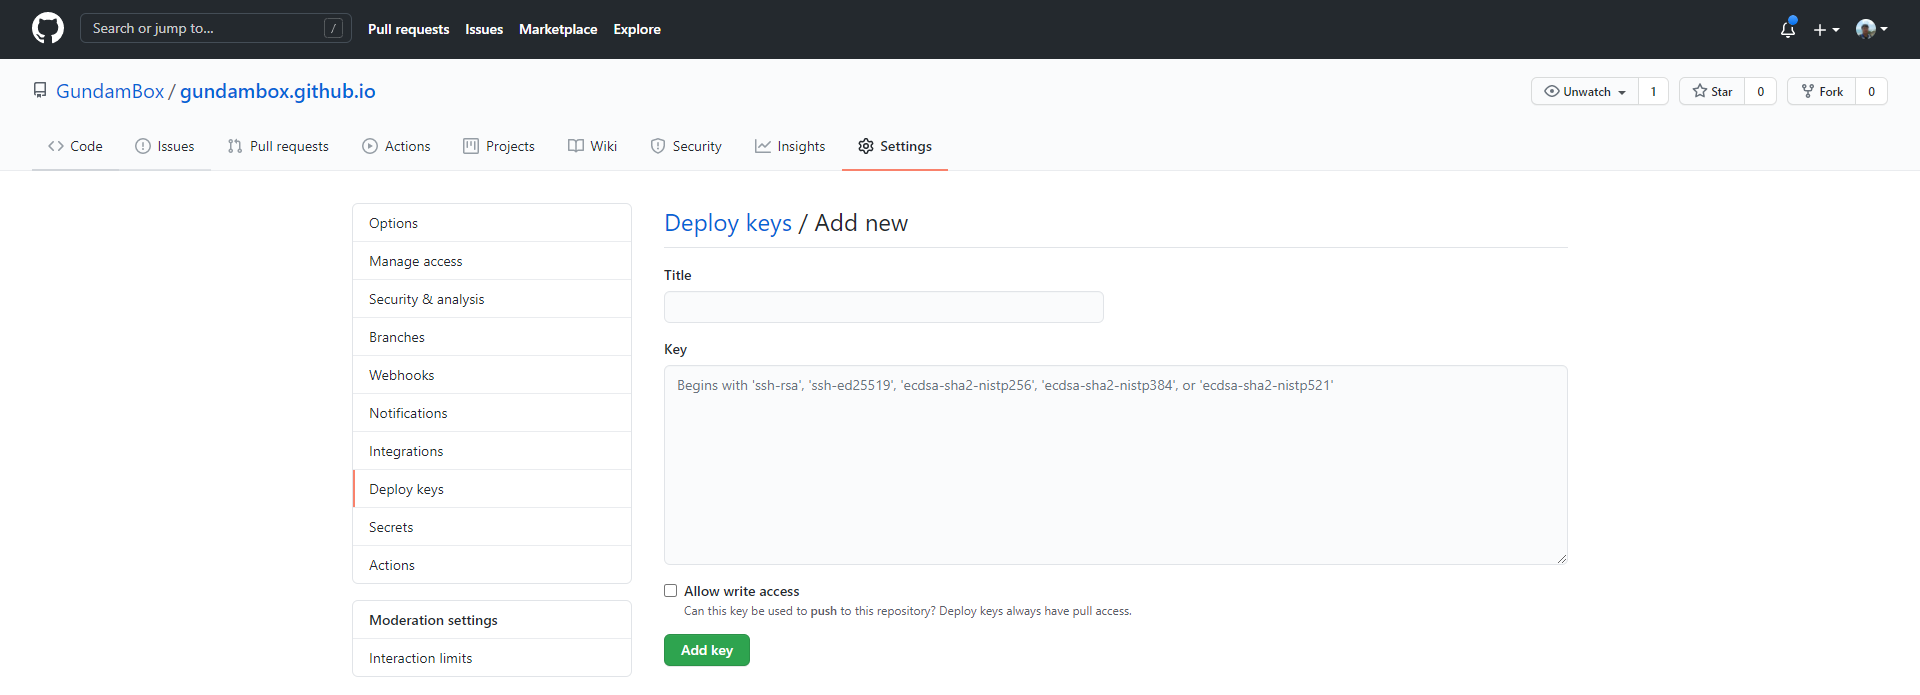
在 Public Repository 加入 Public Key
Public Repository -> Settings -> Deploy keys -> Add deploy key
將剛剛產生的公鑰複製貼上,並將名稱命名為 hexo
記得勾選 “Allow write access”,不然會炸掉XD

建立 GitHub Actions
建立 .github/workflows/hexoActions.yml
1
2
mkdir .github/workflows
vim hexoActions.yml修改 action
1
2
3
4
5
6
7
8
9
10
11
12
13
14
15
16
17
18
19
20
21
22
23
24
25
26
27
28
29
30
31
32
33
name: 'hexo deploy'
on:
push:
branches:
- master
jobs:
build:
runs-on: ubuntu-latest
steps:
- name: Checkout
uses: actions/checkout@v1
- name: Use Node.js 12.x
uses: actions/setup-node@v1
with:
node-version: "12.x"
- name: init)init ssh
run: |
mkdir -p ~/.ssh/
echo "${{secrets.HEXO}}" > ~/.ssh/id_rsa
chmod 600 ~/.ssh/id_rsa
ssh-keyscan github.com >> ~/.ssh/known_hosts
git config --global user.name "YOUR_USERNAME"
git config --global user.email "YOUR_EMAIL"
- name: A)npm install
run: |
npm install
- name: B)npm install -g hexo-cli
run: |
npm install -g hexo-cli
- name: C) hexo d -g
run: |
hexo d -g
設定 hexo/_config.yml
原本的 _config.yml 設定
1 | deploy: |
改成
1 | deploy: |
確認 Actions 執行結果

確認無誤後,以後寫好文章在 Local 端預覽完就可以歡樂的 push 到 Private Repository
後記
寫好文章跑一次部署大約花 1 分鐘,GitHub 每個月給 2000 分鐘的免費額度真的佛心